When crafting or creating interesting projects, to employ a cutting machine can be an unique experience in an effective manner. If people fail to use the cutting machine appropriately, this can lead to a frustrating exercise. In this way, there is a need for people to learn how to use the cutting machines like Circut Maker, Silhouette Cameo, etc., enabling to boast sound experience with smoother operation. Whether you are professional or new one in this sector, this blog serves to allow you to be more familiar with the cutting machine, tips on how to use Circut Maker 3, and the solutions to problems than ever before. Let’s take a deep dive into the following parts:
Part One: Cutting Machine Like Circut Maker
At the beginning, Circut is considered as a cutting machine, aiming to cut a ton of different materials, including paper, card, stock, adhesive vinyl, and heat transfer vinyl. People are able to use the Circut to cut everything what they want due to the speed and precision. Different from the ideas that Circuts print an image onto paper, the Circut mainly cuts a shape out of a sheet of paper or vinyl. A small blade, which is designed to cut the design no matter how delicate and intricate, can be found when opening up a Circut machine.
2 types of Circut machine is available for design makers, at the time being. Circut Maker 3 is one of the next generation of the Circut cutting machines, which also includes Circut Explore Air 3. Circut Maker 3 enables you to boast more ways to creation in addition to the enhanced speed and other details. During the process, you may be confused with the rule about how to name the Circut in that there is no Circut Maker 2 in the sector. As a matter of fact, to keep things consistent, Circut decided to go with 3 for this Circut Maker machine in order to match the new Circut Explore Air 3.
Part Two: How to Use Circut Maker 3
Prior to getting started with using your Circut Maker 3 machine, it is imperative to set it up with the correct methods. In the first place, installing the Circut Maker 3 on a smooth surface is asked. And then, the Firmware should be updated to the latest version.
Due to the fact that Circut Maker 3 boast different tools for different scenario, selecting a right tool to work is a must. When it is well prepared, you should choose a design in Circut Design Space. Pre-made image or creative image on your own is preferred.
The third step is to select your cutting material and place it on the sticky cutting mat. The mat will hold the material in place while the Cricut cuts the design, and the button should be pressed to load the mat into the machine.
And then, the correct material settings in Design Space should be selected to send the Circut cutting machine the desired design.
The most important step is to press the flashing button on the Circut machine to initiate the work.
After this, the machine finishes cutting the design, remove the mat from the machine, and the material from the mat. And you are able to get your expected paper pieces or vinyl creations.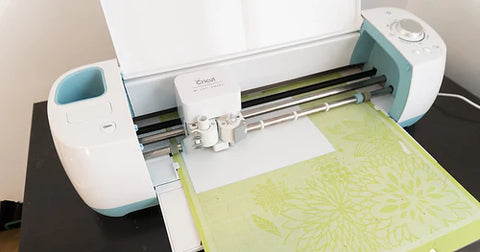
Part Three: Solutions to Problems
Since you have known the detailed steps on how to use Circut Maker 3, diversified problems may await you. In this blog, we primarily expounds that Circut doesn’t cut properly. Failure to cut all the way through materials with Circut Maker can be attributed to some basic troubleshooting. To check the following reasons and solutions is required:
3.1 Generally speaking, the materials what you want to cut should be well matched you selected in the material settings. It is imperative to noted that the material setting selected on the should be tied up with the “Design Space” or “Smart Setting Dial”, preventing the material from not matching on the machine pad. On the other hand, if you are accustomed to using the Circut Explore model, make sure the dial is in the Custom status, and the Custom Material list can be selected appropriately.
3.2 Circut brand blades should be used wisely. When opening Clamp B and removing the blade holder from the machine, you are asked to take a look at the blade as well as blade housing, and remove any debris that may be stuck to the blade or remaining in the blade housing. Once these steps are done, a test cut is required to enable the machine to operate smoothly. If not, the steps mentioned above should be done repeatedly.
3.3 There is a prerequisite to increase the pressure to the certain settings. You should open the Manage Custom Materials page via the account menu, and enhance the pressure to the material settings by 2-4. It should be noted that the action is asked to repeat 2-3 times with the increments of 2-4 to prove whether the cutting results change accordingly and then how the result changes.
3.4 Another way is to clean the cutting mat so as to remove debris as well as leave much room for the usage of the front and back side. You may try to use a different material to see whether the machine works well. If so, changing the material is the optimal manner. Also, attempt to adopt a different web browser to check that.
In conclusion, before embarking on a new journey in the Circut sector, people should grasp a basic understanding of the Circut machines, the typical Circut working principles, and some issues may encounter with. Hope this blog finds you well.


![[Starter Kit] Auto Heat Press Machine 15" x 15" 110V + Starter Kit Bundle](http://www.htvront.com/cdn/shop/files/21_080605f2-5363-49a8-87f9-98c73560a5e9_385x.jpg?v=1713344774)
![[Premium Bundle] Auto Heat Press Machine 15" x 15" 110V + 20 rolls HTV Bundle 12“x3ft + Mini 2 Heat Press Machine + Random Sublimation & HTV Bundle ≥ $180](http://www.htvront.com/cdn/shop/files/1UK_4_385x.jpg?v=1713340288)