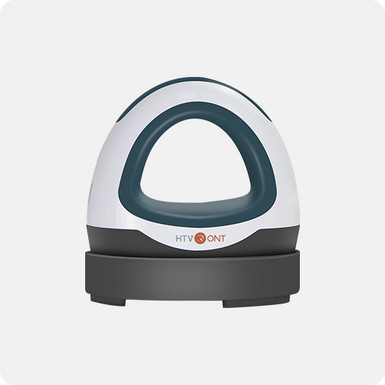
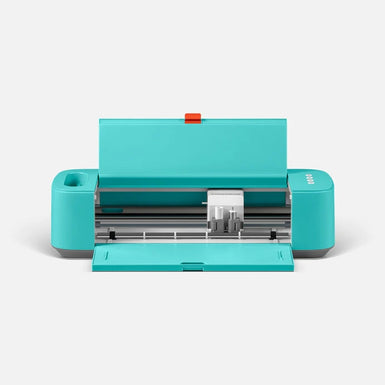
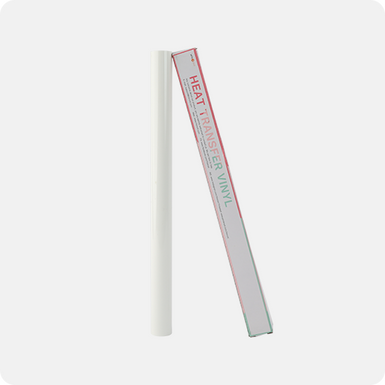
Heat transfer vinyl is a special type of vinyl that can be cut on a Silhouette or Cricut cutting machine and then heated and pressurized onto fabrics such as clothes, pillowcases, bags, etc. You can use a heat press or iron. If you want to carry out many HTV projects or complete sales, the adoption of a heat press is preferred. Whether you are new to Silhouette CAMEO or a beginner in thermal transfer vinyl, HTVRONT has some tips and tricks to help you start your first HTV project!

Silhouette vs. Cricut: which is better?
As is known to all, both Cricut and Silhouette offer high-end machines, namely the Maker and the Cameo. Prior to the introduction of the Cricut Maker 3, the Silhouette Cameo 4 held a competitive advantage in the ongoing Cricut vs. Silhouette comparison, particularly in terms of cutting strength. Despite being the more robust machine, the Cameo 4 maintains a more cost-effective pricing structure. However, the debate arises as to whether raw power is a requisite factor in the realm of craft cutting.
Concerns emerge regarding the persistent software expenses associated with Design Space, necessitating a subscription for optimal utilization. This may potentially inflate the overall cost of owning a Cricut Maker 3 beyond its initial purchase price. Nonetheless, Design Space boasts user-friendly features, aligning with the overall ease of use associated with both Maker 3 and Cricut's design interface.
For the additional investment, Cricut Maker 3 offers an enhanced user experience. Characterized by thoughtful design, the machine includes a port for displaying and charging your iPad or smartphone during operation. Although not included in the initial purchase, the Cricut Maker 3 presents a broader array of tools, allowing users to engage in debossing, scoring, drawing, and cutting various materials. The choice between the Maker 3 and the Cameo 4 hinges on individual skill levels and project requirements.
In this article, we're here to offer some insights about the way on how to use Sihouette Cameo 4 in a specific circumstance. Later, the detailed comparison in selecting Cricut or Sihouette machine will be expounded in a later article. Please stay tuned for our latest updates. Let's take a deep dive into the Sihouette Cameo 4 to enjoy the crafting journey.
Silhouette CAMEO Heat Transfer Vinyl Tips for Beginners
HTVRONT recommends simplifying your first heat transfer project by using a T-shirt, which has a larger open area and is easy to iron or heat press. You may also want to test HTV vinyl on a cheap product first until you master it.
You can buy heat transfer vinyl sheets or rolls at the HTVRONT store. HTVRONT is the best-quality heat transfer vinyl brand; the material cuts very easily and consistently on Silhouette CAMEO and Cricut.
Before you try to use Glitter HTV, Stretch HTV, or layering HTV, if you use a smooth HTV like HTVRONT PU materail, which boasts multiple colors, and start cutting, you will learn more about the basics and be more confident in your future attempts and use!
The selection of suitable films for wearable products is paramount, taking into account the compatibility with the intended fabric. While it may seem straightforward, careful consideration is necessary. In general, standard PU and PVC vinyls exhibit compatibility with cotton, polyester, blends of cotton and polyester, as well as acrylic fabrics, catering to the majority of casual and active apparel sales.
Certain fabrics may be adversely affected by time and temperature requirements, potentially resulting in damage, or the adhesives may not adhere effectively. Special fabrics, such as nylon, leather, and Lycra spandex, necessitate the use of different films to ensure optimal results. With regard to the introduction of heat transfer vinyl, you are able to read the related article, A Ultimate Guide to Heat Transfer Vinyl.
Except for some patterned heat transfer vinyls, most heat transfer vinyls are placed on a transparent carrier plate. The HTV must be reversely cut and weeded while keeping the required parts on the transparent carrier board. After the HTV on the transparent carrier plate is pressed to the surface of the T-shirt, the carrier plate can be removed. The supplies and tools you may need:
1. Heat Transfer Vinyl
2. Cutting mat
3. Silhouette CAMEO 4
4. Mini Easy Heat Press
5. Teflon Sheets
6. T-shirts or other fabric where you want to iron.

How to Set up HTV in Silhouette Studio?
Open the Silhouette Studio software. I made a T-shirt for my son using Design, which is available for free on our HTVRONT store. If you also like the design of our store, you can also send an email to contact us. We will tell you how to get it for free. Find your design in your folder and double-click to open it.
First, import the file. You need to import the file you need to design in Silhouette Studio. Adjust your position. To avoid waste, I usually adjust the file to the upper left corner. Note that since your HTV needs to be ironed onto the clothes, don’t forget to mirror or flip the design in Silhouette Studio.
Second, paste the vinyl on the cutting mat. Paste the vinyl we need to the cutting mat of the HTVRONT so that the shiny side of the HTV is facing down. This will make the adhesive side or back of the HTV face up; that's why the reverse cut is necessary. Here, you can use the cutting mat of the HTVRONT brand, which is sticky and can be reused many times.
Third, put HTV into the machine. Put the upper edge of the cutting mat into the machine, lightly lean against the roller, and then align the left edge with the line and arrow on the left side of the machine. This will pull the mat and HTV under the drum and into the correct starting position.
Forth, send for cutting. After adjusting the position, return to Silhouette Studio and click "Send" from the "Send" panel to start cutting.
Last, cutting is finished. After the cutting is finished, weed the weeds. I usually use our HTVRONT weeding tool set, and then it can be hot pressed onto the clothes. At this point, your cutting step is complete.


![[Starter Kit] Auto Heat Press Machine 15" x 15" 110V + Starter Kit Bundle](http://www.htvront.com/cdn/shop/files/21_cb9c4334-9a40-499d-a46b-d0ed56004aea_385x.jpg?v=1713863818)
![[Premium Bundle] Auto Heat Press Machine 15" x 15" 110V + 20 rolls HTV Bundle 12“x3ft + Mini 2 Heat Press Machine + Random Sublimation & HTV Bundle ≥ $180](http://www.htvront.com/cdn/shop/files/1UK_4_22c12b1b-12dd-4105-ac25-93e2faae6a8c_385x.jpg?v=1713863580)


Customer Reviews
I’m looking to buy an cutting machine