How to DIY a Phone Case with an HTVRONT H17 Phone Case Heat Press
Written by Mercy Lilian
|
Published on
|
Modified on
|
Reading time for 6 min
The phone goes everywhere with you. Having a customized phone case goes beyond just protecting the phone to expressing your personality. And now, the new HTVRONT H17 phone case heat press makes it easier than ever to transfer designs to your phone case. Not just that, you can also use it to customize coasters, badges, fridge magnets, keychains, ceramic tiles, and many more.
In this article, I will focus on how to use LOKLIK Idea Studio software to edit your design, print it, and lastly, how to operate the HTVRONT H17 phone case heat press to transfer the design. Once you are through with the first trial, you will get addicted to the ease and fun of using the heat press to design different substrates.
Want to make a super cool phone case yourself? This video is all you need! From selecting materials to heat transfer, we'll guide you step by step to create a super unique phone case with the HTVRONT H17 Phone Case Heat Press!
Before moving on to the actual heat pressing process, it’s important to ensure your design is properly prepared. Once you’ve uploaded and edited your artwork to fit the phone case dimensions, the next step is to set up the heat press machine for optimal results.
Step 1: Upload and Edit the Design
You can do this either using the LOKLIK Idea Studio desktop version or the phone version.
Using a Desktop
Open the LOKLIK Idea Studio software on your computer and upload the design. You can either drag and drop or import an already done image. Although the software supports SVG, JPEG, and BMP formats, it is best to use PNG for layered and detailed designs.
Click on the canvas settings and select “phone case heat press”.
Then it will prompt you to choose your phone model from the pre-made template list that includes Samsung, Google, Xiaomi, Huawei, and Badge.
A green frame will appear on the canvas, representing the phone case for the model you choose. The dimensions are accurate, so you only need to fit the image within the frame without altering the frame itself. Ensure the design perfectly fits without any edges peeking out, as they will be cut out after transferring.
Remember to mirror the image before sending it to the printer, especially if it has any letters, numbers, or logos that have to keep a certain orientation.
Using a Mobile Device
Open the LOKLIK Idea Studio software on your mobile device and upload the design.
You will follow the same steps as you would when using a computer (as shown above), only with a phone version of the software.
Choose the phone model.
Choose the HTVRONT H17 Phone Case Heat Press.
Get the image.
Resize it.
Step 2: Insert the Sublimation Film in the Printer
Power up the sublimation printer and open the paper tray. Load a blank sublimation film with the matte side facing up, as it is the side where the design will print. Sometimes the printer will jam when its sensor fails to detect the film. This can be easily fixed by placing a label paper on the bottom left of the film, on the printable side.
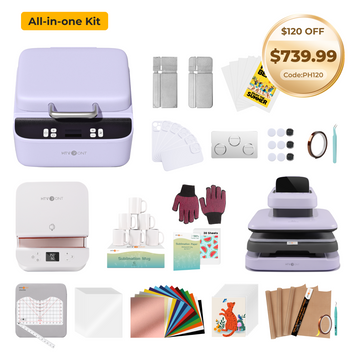
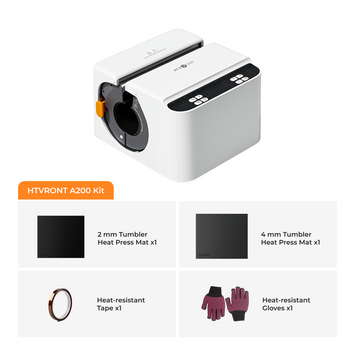
If you want to buy all the materials at once, you can go directly to the H17 accessories section on the HTVRONT website.
Step 3: Print the Design
Select high-quality printing. If your machine has the option, choose the right ICC color profile. It helps match the printed colors with what transfers to the phone case. Press the start button.
After printing, let the film dry, and avoid touching the wet area as it is still smudgy.
Step 4: Power up Your Phone Case Heat Press Machine
As the film dries up, plug the heat press into a power source. When the power button starts flashing white, it means that the device is properly plugged in. Press it to start the machine.
Step 5: Apply the Right Settings
Press the temperature button and set it to 125 degrees and 135 degrees for the lower and upper heating plates, respectively.
Then, lightly press the time button and set it to 305 seconds for preheating and pressing.
Here are recommended settings for different substrates.
Phone Case Material
Temperature
Time
Poly-coated plastic
188°C
50 seconds
Coated hard rubber
188°C
45 seconds
Sublimation-ready leather
179–185°C
40 seconds
Fiberboard
190°C
60 seconds
Step 6: Place the Phone Fixture Inside the Heat Press
Put on your heat-resistant gloves and place the phone model in the heating area. Then use the filler blocks provided to fill the gaps for bigger phone cases.
Step 7: Preheat the Heat Press
Close the heat press cover and press the start button to preheat.
After the green light comes up, put the printed sublimation film on the heat press with its printed side facing up. Leave it to dry for 5 minutes. Completely drying the sublimation film improves the results after transferring.
Step 8: Cover the Lens Gap on the Phone Case
As you wait for the film to dry, place the lens pad inside the phone case to cover the gap meant for the phone camera and flashlight. Use heat-resistant tape to secure the pad.
The phone case should be free of dust and grease before pressing.
Step 9: Mount the Case onto the Fixture and Place the Film
Place the phone case on the fixture and press it down. Press firmly towards the lower left to help the fixture contract and fit more easily.
Put the film in the heating chamber with the printed side facing down. Ensure it is flat before closing the heat press lid.
Step 10: Start the Heat Transfer
When the heat press reaches the set temperature, press the start button.
Step 11: Remove the Sublimation Paper
When the transfer process is complete, open the heat press cover and peel the sublimation film while it is still hot, with your heat-resistant gloves on.
Then remove the phone case from the fixture and let it cool.
Just like that, you have completed your DIY phone case design.
FAQs on the Phone Case Heat Press
1. Why is the design blurry and the colors faded after the transfer?
This could be caused by using lower temperatures than the recommended ones or pressing for a short period. Use the correct temperature and time settings. The sublimation film may also not have fully adhered or been tightly pressed onto the substrate. Check the printer to ensure everything is aligned.
2. Can a regular printer print the design?
No. Standard printers often produce poor-quality prints using sublimation ink, which is necessary for the transfer process. Instead, use a sublimation printer and ink.
3. Can I peel the sublimation film when cold?
The sublimation feel should be peeled from the carrier immediately after a transfer, while it is still hot. This ensures that the design does not stick back to the film. However, you should always follow the manufacturer’s recommended peeling method.
4. Should the design be mirrored before printing?
Yes. Not mirroring the image makes it appear reversed after transferring. When printing on sublimation paper, the image is printed face down, meaning that the process will eventually be reversed when pressing it onto the phone cover.
A tumbler heat press uses heat and pressure to transfer designs onto tumblers, mugs, and bottles. It works by activating sublimation ink through high temperatures, bonding the design permanently to...
A tumbler heat press uses heat and pressure to transfer designs onto tumblers, mugs, and bottles. It works by activating sublimation ink through high temperatures, bonding the design permanently to...
A tumbler heat press is a tool for customizing drinkware, with prices ranging from $100 to over $1,000 depending on material, features, and brand. The article analyzes the characteristics of...
A tumbler heat press is a tool for customizing drinkware, with prices ranging from $100 to over $1,000 depending on material, features, and brand. The article analyzes the characteristics of...
Using a heat press on a tumbler is a great way to create custom designs for personal use or business projects. This guide provides detailed steps, from preparing your design...
Using a heat press on a tumbler is a great way to create custom designs for personal use or business projects. This guide provides detailed steps, from preparing your design...
DTF printing and sublimation are popular DIY techniques, but they differ in materials, processes, and results. Sublimation embeds vibrant designs into polyester or coated materials, offering seamless, durable prints but...
DTF printing and sublimation are popular DIY techniques, but they differ in materials, processes, and results. Sublimation embeds vibrant designs into polyester or coated materials, offering seamless, durable prints but...
This video was created by YouTuber @The Print Life and uploaded by Tia. Want an easier way to make DIY T-shirts? The HTVRONT T-shirt Heat Press makes everything simpler!
This video was created by YouTuber @The Print Life and uploaded by Tia. Want an easier way to make DIY T-shirts? The HTVRONT T-shirt Heat Press makes everything simpler!
This video is created by YouTuber @Madebyjasndk and uploaded by Tia. Is the HTVRONT Automatic Tumbler Heat Press worth it? Watch how Madebyjasndk uses the Tumbler Heat Press to create...
This video is created by YouTuber @Madebyjasndk and uploaded by Tia. Is the HTVRONT Automatic Tumbler Heat Press worth it? Watch how Madebyjasndk uses the Tumbler Heat Press to create...
This video was created by YouTuber @plannerzoid and edited and uploaded by Tia.Don't know which heat press to buy for Black Friday and Cyber Monday? Why not try a Phone...
This video was created by YouTuber @plannerzoid and edited and uploaded by Tia.Don't know which heat press to buy for Black Friday and Cyber Monday? Why not try a Phone...
This video is created by Youtuber @Kayla's Cricut Creations and uploaded by Tia. The annual Black Friday is coming! HTVRONT is offering the biggest discounts of the year on heat...
This video is created by Youtuber @Kayla's Cricut Creations and uploaded by Tia. The annual Black Friday is coming! HTVRONT is offering the biggest discounts of the year on heat...


 Black Friday Gift
![[FREE] Random DIY Supplies Inside (Get One Random Material)--Every Customer Can Only Get Once, More will not be delivered](http://www.htvront.com/cdn/shop/files/8_d6487144-bf3e-45d8-9b83-bb37b659224b-3_355x.png?v=1764409882)