Heat pressing a T-shirt is a popular and efficient method for customizing apparel with designs, logos, or artwork. Whether you're a hobbyist looking to create personalized gifts or an entrepreneur starting a T-shirt printing business, mastering the heat press process is essential. This guide will walk you through the tools, materials, and steps needed to heat press a T-shirt successfully.
What is Heat Pressing?
Heat pressing is a method of transferring designs onto fabric using heat and pressure. It involves the use of a heat press machine, which applies consistent heat and pressure to transfer vinyl, sublimation ink, or other materials onto a T-shirt. The process is quick, reliable, and produces professional-quality results.
Tools and Materials You’ll Need
Before diving into the process, gather the necessary tools and materials:
Heat Press Machine
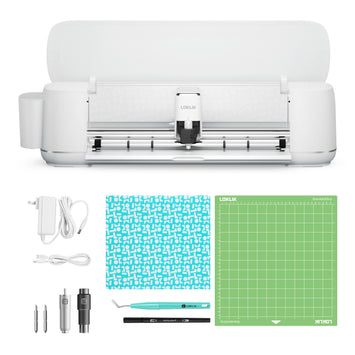
The T-shirt press machine is the primary tool for this process. They come in various types, including clamshell, swing-away, and multifunction presses. Choose one that suits your needs and budget.
T-shirt
Select a T-shirt made of suitable material, such as cotton, polyester, or a blend. The fabric type will determine the type of transfer material you use.
Sublimation Paper: For sublimation printing on polyester T-shirts.
Transfer Paper: For inkjet or laser-printed designs.
Weeding Tools
These are used to remove excess vinyl from your design.
Parchment Paper or Teflon Sheet Protects the T-shirt and design during the heat press process.
Lint Roller Removes dust and debris from the T-shirt to ensure a smooth transfer.
Heat-Resistant Tape Keeps your design in place during pressing.
Ruler or Measuring Tape Helps center the design on the T-shirt.
Step-by-Step Process for Heat Pressing a T-shirt
Step 1: Prepare Your Design
Start by creating or selecting your design. If you’re using heat transfer vinyl, cut the design using a vinyl cutter and weed out the excess vinyl using weeding tools. For sublimation or transfer paper, print your design using the appropriate printer and ink.
Step 2: Preheat the Heat Press Machine
Turn on your heat press machine and set it to the correct temperature and time based on the type of material and T-shirt fabric. Refer to the manufacturer’s instructions for guidance. For example:
HTV: 305°F (150°C) for 10-15 seconds.
Sublimation: 385°F (195°C) for 45-60 seconds.
Allow the machine to fully heat up before proceeding.
Step 3: Prepare the T-shirt
Lay the T-shirt flat on the heat press platen. Use a lint roller to remove any dust or debris that could interfere with the transfer process. Pre-press the T-shirt for 5-10 seconds to remove moisture and wrinkles, ensuring a smooth surface for the design.
Step 4: Position the Design
Place the design on the T-shirt in the desired location. Use a ruler or measuring tape to ensure the design is centered and aligned. If necessary, secure the design with heat-resistant tape to prevent shifting.
Step 5: Apply the Heat Press
Cover the design with a Teflon sheet or parchment paper to protect it and the heat press platen. Lower the heat press handle to apply heat and pressure. Follow the recommended time, temperature, and pressure settings for your transfer material.
Step 6: Remove the Carrier Sheet
Once the timer goes off, lift the heat press handle and carefully peel off the carrier sheet. Depending on the type of vinyl or transfer paper, this step may require a hot peel (immediately after pressing) or a cold peel (wait for the design to cool).
Step 7: Check the Design
Inspect the design to ensure it has adhered properly to the T-shirt. If any edges are lifting, cover the design again with a Teflon sheet and press for a few more seconds.
Tips for Successful Heat Pressing
Test Beforehand Always test your heat press settings on a scrap piece of fabric or an old T-shirt to avoid mistakes.
Use the Right Pressure Too much or too little pressure can affect the transfer quality. Adjust the pressure knob on your machine to match the thickness of the T-shirt and transfer material.
Choose the Right Fabric Not all fabrics are suitable for heat pressing. Avoid materials like nylon or heat-sensitive fabrics unless your transfer material is specifically designed for them.
Keep the Work Area Clean Dust, lint, or debris can ruin the transfer process. Use a lint roller and work in a clean environment.
Follow Manufacturer Instructions Different brands of HTV, sublimation paper, and transfer paper have specific temperature and time requirements. Always follow the manufacturer’s recommendations.
Common Mistakes to Avoid
Incorrect Temperature or Time Using the wrong settings can result in designs that don’t adhere properly or get damaged.
Uneven Pressure Ensure the heat press applies even pressure across the entire design.
Not Pre-Pressing the Shirt Skipping the pre-press step can lead to poor adhesion due to moisture or wrinkles.
Peeling Too Early or Late Follow the recommended peel instructions for your material (hot or cold peel) to avoid ruining the design.
The Best Heat Press Machine for T-shirts
1. Mini Heat Press
The HTVRONT Mini Heat Press is the perfect choice for small heat press projects, thanks to its lightweight and portable design. Specifically designed for DIY enthusiasts, this compact yet powerful machine offers incredible flexibility and ease of use. It’s ideal for pressing small designs onto T-shirts and can also be used for customizing items like canvas shoes, hats, and more. The Mini Heat Press features quick-heating technology, saving you time while ensuring high-quality transfers every time. Whether you're a beginner or a seasoned pro, this machine is a fantastic tool for creative projects.
2. H10 Portable T-shirt Press
The H10 Portable T-shirt Press is a versatile, handheld heat press machine with real-time pressure, temperature, and time display, allowing users to control every step of the process with precision. The dual-handle design ensures stability during operation and is ergonomically designed for comfort, even during extended use. The H10 is compatible with a variety of materials, including T-shirts, hoodies, and canvas bags, making it perfect for a wide range of projects. Its compact design makes it easy to store and convenient to use anywhere, offering a balance of professional performance and portability.
3. Auto Heat Press Digi 2
The HTVRONT Auto Heat Press Digi 2 is a top-of-the-line, smart heat press machine designed for efficient, high-volume production. It features automatic pressing and lifting functions, along with a slide-out tray, making operation both convenient and safe. With precise temperature and pressure controls, this machine ensures professional-grade results every time. Additionally, the expanded height adjustment feature accommodates thicker materials, making it an excellent choice for small business owners and advanced DIY enthusiasts looking to produce custom T-shirts in bulk. The user-friendly and intelligent design of the Digi 2 significantly boosts productivity and simplifies the heat press process.
Conclusion
Heat pressing a T-shirt is a straightforward process when you have the right tools, materials, and techniques. By following the steps outlined in this guide, you can create high-quality, customized T-shirts for personal use or business purposes. With practice and attention to detail, you’ll be able to produce professional-looking results that stand out. So, fire up your heat press machine, get creative with your designs, and start making stunning T-shirts today!
Discover 10 Easter DIY projects for 2026, ranging from beginner-friendly crafts to advanced show-stopping decor. Learn how to use heat press with heat transfer vinyl, DTF printer for full-color transfers,...
Discover 10 Easter DIY projects for 2026, ranging from beginner-friendly crafts to advanced show-stopping decor. Learn how to use heat press with heat transfer vinyl, DTF printer for full-color transfers,...
Easter 2026 falls on April 5 (Western) and April 12 (Orthodox). This comprehensive guide explains why the date changes each year, the religious significance of the resurrection, the pagan origins...
Easter 2026 falls on April 5 (Western) and April 12 (Orthodox). This comprehensive guide explains why the date changes each year, the religious significance of the resurrection, the pagan origins...
Discover 5 creative projects for your heat press beyond basic t-shirts. Learn how to make custom wooden coasters, canvas tote bags, metal signs, structured hats, and personalized mouse pads. Includes...
Discover 5 creative projects for your heat press beyond basic t-shirts. Learn how to make custom wooden coasters, canvas tote bags, metal signs, structured hats, and personalized mouse pads. Includes...
Discover the science behind color-changing magic mugs and learn 4 DIY methods to make your own—from professional heat press techniques to fun kids' crafts. Includes step-by-step tutorials and expert tips.
Discover the science behind color-changing magic mugs and learn 4 DIY methods to make your own—from professional heat press techniques to fun kids' crafts. Includes step-by-step tutorials and expert tips.
Your browser does not support the video tag. The heat press featured in this video is the H10 Portable T shirt press. Unlike traditional clamshell heat presses, this handheld model...
Your browser does not support the video tag. The heat press featured in this video is the H10 Portable T shirt press. Unlike traditional clamshell heat presses, this handheld model...
Your browser does not support the video tag. The heat press featured in this video is the A200 Tumbler Heat Press. It's designed for sublimation on smooth glass, frosted glass,...
Your browser does not support the video tag. The heat press featured in this video is the A200 Tumbler Heat Press. It's designed for sublimation on smooth glass, frosted glass,...
Your browser does not support the video tag. The heat press featured in this video is the A200 Tumbler Heat Press — a versatile machine designed for sublimation on all...
Your browser does not support the video tag. The heat press featured in this video is the A200 Tumbler Heat Press — a versatile machine designed for sublimation on all...
Your browser does not support the video tag. The heat press featured in this video is the A200 Tumbler Heat Press — a versatile machine designed for sublimation on various...
Your browser does not support the video tag. The heat press featured in this video is the A200 Tumbler Heat Press — a versatile machine designed for sublimation on various...


 Cart Unlocks Add-On Deals