This is a video about how to use HTVRONT HTV glitter vinyl on T shirt. You can learn some useful tips about how to use heat transfer vinyl for transferring designs to T shirts. If there are several colors of your design, how to make sure multiple colors transferred to vinyl project. How to make the image on the Cricut designs it self.
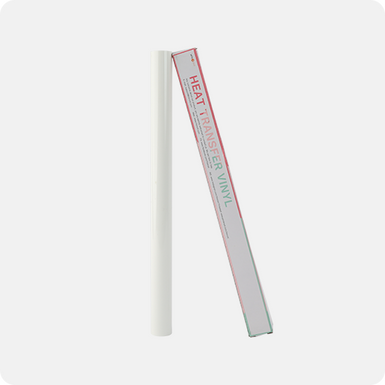
To start, it is suggested to buy a roll of HTV glitter vinyl as you can use it for many times and different color can make designs vivid and lovely. Besides, it is economically to save your money.
And you need to prepare a list of HTV tools.
Silhouette or Cricut.
Glitter HTV Vinyl: 18 pack 12"x10" Assorted Color HTV Sheets- https://htvront.net/collections/htvront-htv-13-pack-12-x-10-iron-on-vinyl-for-t-shirt
A blank T shirt or any fabric you wan to craft.
Tools for Weeding
Teflon Sheet
An Iron
A Ruler
A Pair of Scissors

Steps for apply designs to T shirt by heat transfer vinyl.
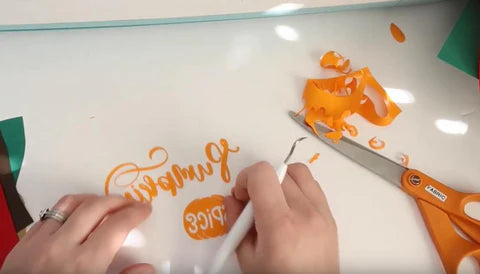
- To print designs, please make sure to cut on the vinyl side, not the clear backing side.
- Cut mirrored design by Cricut machine on the "iron-on" setting.

- Weed the excess vinyl with Cricut weeding tool.
- Preheat the iron, temperature 305 degrees Celsius. Use iron on the T shirt to make it flat and smooth.
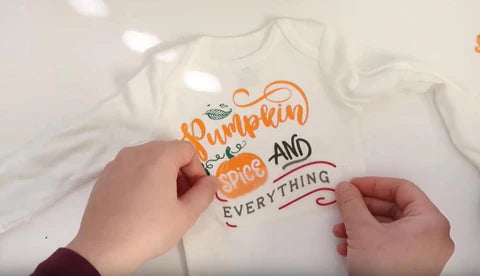
- Put the vinyl on the T shirt, and put a Teflon sheet on the vinyl to avoid directly ironing and protect T shirt from being burnt.
- Place iron on top of Teflon sheet and apply firm pressure for 10 seconds or so.

- Cool for a few seconds.
- Peel the transfer sheet from the now-adhered vinyl to reveal your finished design

- If the design isn't fully adhered, place iron on top of the transfer sheet again for 10-15 seconds and repeat steps 7 & 8.

Here are a few tips if you’re planning to transfer HTV vinyl to vinyl project :
1.Prep the fabric by pressing it only on 180 degree Celsius for 3 seconds.
2. Position vinyl and press for 5 seconds (with a Teflon sheet burier) - lift to let the cape/vinyl cool for 10 seconds. Down for 5 seconds - up for 10, down for 5 (15 seconds total with 2 10 second breathers).
3. Peel vinyl cover off & flip cape - down for 5 seconds on back of fabric.
4. Flip fabric again and down for another 5 seconds on the front - then lay the cape flat to cool.
5. When ironing different colors, jut make sure the plastic doesn't overlap the vinyl.That's why do it a color at a time. Just to be safe.


![[Starter Kit] Auto Heat Press Machine 15" x 15" 110V + Starter Kit Bundle](http://www.htvront.com/cdn/shop/files/20240425-170634_385x.jpg?v=1714036345)
![[Premium Bundle] Auto Heat Press Machine 15" x 15" 110V + 20 rolls HTV Bundle 12“x3ft + Mini 2 Heat Press Machine + Random Sublimation & HTV Bundle ≥ $180](http://www.htvront.com/cdn/shop/files/1UK_4_22c12b1b-12dd-4105-ac25-93e2faae6a8c_385x.jpg?v=1713863580)