

 Black Friday Gift
![[FREE] Random DIY Supplies Inside (Get One Random Material)--Every Customer Can Only Get Once, More will not be delivered](http://www.htvront.com/cdn/shop/files/8_d6487144-bf3e-45d8-9b83-bb37b659224b-3_355x.png?v=1764409882)
$0.00
Regular price
Regular priceSale price
Unit price
per
$0.00
Recommended products

$169.99
Regular price
Regular priceSale price
Unit price
per
$169.99
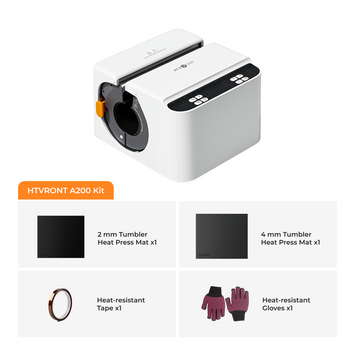
$299.99

$359.99
Regular price
Regular priceSale price
Unit price
per
$359.99
$487.93
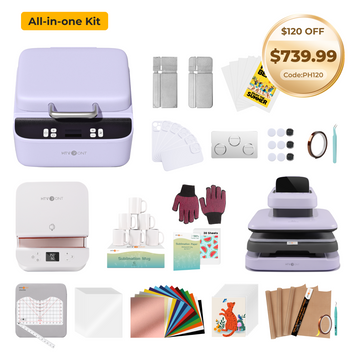
$859.99
Regular price
Regular priceSale price
Unit price
per
$859.99
$1,100.86

$279.99
Regular price
Regular priceSale price
Unit price
per
$279.99
$279.99
Regular price
Regular priceSale price
Unit price
per
$279.99

SECURED PAYMENT


FREE SHIPPING ON ORDERS $39+
3-15 Days Delivery

MONEY-BACK GUARANTEE
Your satisfaction is our priority
Summary
Your promotional coupon
TIPS:promotional coupon
Estimated Total:
$0.00


