Stickers on the car can be seen from time to time when you walk all along the road. However, you may grasp a little understanding of how to make it. In this article, we mainly expound the car decals, the usage of adhesive vinyl, methods to make car decals, and even the way to remove car decals. By doing so, you are able to put your personalized stickers on the window of your car. And car decals enables you to show up the personality like uniqueness to a large extent. Don’t hesitate, let’s dive into the detailed tutorials swiftly.
An Introduction to Car Decals
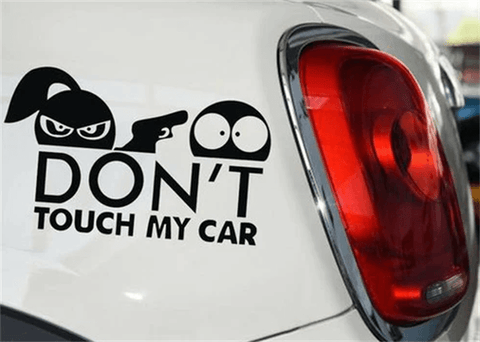
In the first place, there is a need for you to figure out the basic introduction to the car decals. As mentioned before, crowds of adorable as well as awesome stickers on the car sides, car windows, the bumper, and even the hood of cars, can be found nowhere. Most of them are needed to use special stickers that is characterized by strong adhesion. Generally, the decals are more durable that regular stickers, leading to apply these items outside with no worry. As such, the decals can hold up tightly in places what you want to apply and withdraw different weather situation as well.
The car decals is used to be sound and stylish manner to perform the unique personality and display the main realm you are good at and interested in. Meanwhile, some catchy words can be applied on car so as to gain public attention. And the usage of car decals can be a type of advertisement and promotion as long as its enough durability and stickiness.
What Vinyl to Use for Car Decals?
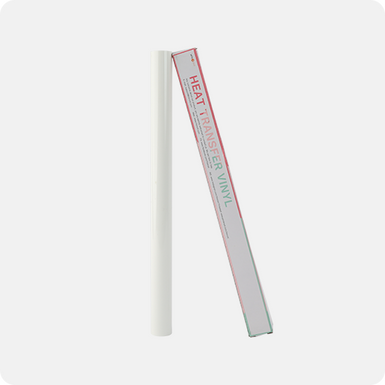
Prior to the official makings of the car decals, it should highlight that adopting a right and appropriate vinyl for car is crucial during the whole process. At the time being, there are several types of crafting vinyl in the sector, covering heat transfer vinyl, printable vinyl, and adhesive vinyl. Due to the requirements of strong stickiness and enough durability, some materials are not accustomed to outside usage. Additionally, some of them fail to work on the smooth surfaces and glasses.
By comparison, adhesive vinyl, which is named as permanent vinyl as well, is selected as the primary decal material. From the technical perspective, this vinyl is pretty sticky and durable. And the vinyl for cars can lead to display vibrant and rich colors for designs, making it ideal for gaining custom car decals.
Recommended Adhesive Vinyl for Car Decals
According to the previous paragraph, adhesive vinyl is the most suitable vinyl for car decals. Concerning about this topic, people may wonder which adhesive vinyl could be the best choice for vinyl car stickers. The main adhesive vinyl providers in the sector includes Circut, Siser, and HTVRONT, at present.
All brands are great to a large extent while it remains differences among them. Specifically, Cricut and Siser are thinner, very sticky, and easy to weed! But they both come with a paper backing and a paper pipe to hold the roll shape, which is much possible to deform during shipping.
HTVRONT comes with strong and sticky PET backing. But it's a little thicker than the above two, which may need to put more energy when setting the cutting parameters to ensure a smooth weeding operation. Still, HTVRONT adhesive vinyl may seem to be a great choice of vinyl for cars.
How to Make Car Decals with Cricut?
Since then, it's time to put your car decals' ideas into reality! Let’s dive into the details about how to make a car decal with the Cricut app, how to make bumper stickers, and lastly, how to remove a car window decal if you don't want it anymore or made a mistake.
First, you need to prepare these necessary items in advance:
- A computer with an editing program.
- A cutting machine.
- A cutting mat.
- A pair of scissors. (That's optional, depending on whether or not you need to cut the finished design out of the vinyl to avoid waste.)
- Adhesive vinyl of your ideal colors.
- A weeder.
- Transfer tape.
- A scraper.
After the preparations are done, you can feel free to select one of your favorite images online and edit it with an editing program. Normally, it is recommended that you use Cricut Design Space to cut down the images. The image can be chosen from just the Design Space app or an outside location like Google and drag it into the app to finish the rest work. (Note: Check if your selected image is the suitable form for the app. )
Remember to pick up simple line images rather than complex, colorful ones so the final results can be clearer and more beautiful on your car. And the cutting and weeding process can be easier. The detailed steps can be found below:
Step 1: Upload your image into the canvas area. Choose "Simple line."
Step 2: Click the cutting parts to make it transparent, with the background checkered.
Step 3: Connect your cutting machine to the computer.
Step 4: Stick your vinyl for car decals on the cutting mat's corresponding place so you won't make the wrong cut. Load the material and mat into the cutting machine.
Step 5: Send the cutting code to the machine. And start cutting. In this part, you should not mirror the image.
Step 6: After cutting out your ideal design, it turns to weed the excess parts of your design away.
Step 7: Use the weeder to pick out excess parts and leave the final image on the vinyl.
Step 8: Until this step, your vinyl decals for cars and bumpers are already finished.
How to Apply Car Decals?
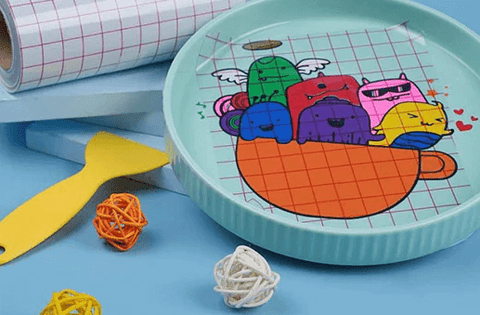
Next, it's about how to apply car decals. Your transfer tape should be cut into a proper shape that fully covers your weeded image. It's asked to stick the transfer tape over the image and use a scraper to remove the bubbles. During this process, your image needs to be adhered firmly.
The most important thing is to peel off the backing carefully. Note that there are two kinds of backing. One is paper backing that is easy to damage and leaves sticky residues. Another is PET backing, which is convenient to see through during the weeding process and strong enough to keep your design intact. And then cleaning up the spot you will put on the sticker, preventing the place from dust and marks is essential.
Following the step that you stick your transfer tape with the image on the correct spot, you need to use the scraper to scrap them again, making the image stick firmly and completely. Finally, you just peel off the transfer tape to enable everything is done!
How to Remove Car Decals?
And if you're making the mistake of tearing the image apart while peeling off the transfer tape, or you want to change your vinyl car decals, hope the following tips and tricks can be solutions to your confusions:
In the first place, there is a need for you to heat up the car decals, in accordance to run heat gun or hair dryer over the surface of the car decals. Following the step of warming car decals, the adhesive becomes easier to remove than ever before.
And then you could use your fingers or something like a plastic card or putty remover to peel up the edges of the decal. Don't use anything sharp that could damage the paint. Remember not to use a scraper for scratching the car. That would be a huge loss.
Adhesive remover is advisable to use. After putting amount of adhesive remover on the area, you just need waiting for a few minutes and then wipe it down with soap and water.
If that does not work well, you can try to use warm water and soak it onto the sticker like a temporary tattoo. You can also boil some water and pour it over it. Both methods should help loosen the adhesive. And then the car decals can be easy and smooth to be wipe out.


![[Starter Kit] Auto Heat Press Machine 15" x 15" 110V + Starter Kit Bundle](http://www.htvront.com/cdn/shop/files/20240425-170634_385x.jpg?v=1714036345)
![[Premium Bundle] Auto Heat Press Machine 15" x 15" 110V + 20 rolls HTV Bundle 12“x3ft + Mini 2 Heat Press Machine + Random Sublimation & HTV Bundle ≥ $180](http://www.htvront.com/cdn/shop/files/20240507-111801_385x.jpg?v=1715052214)