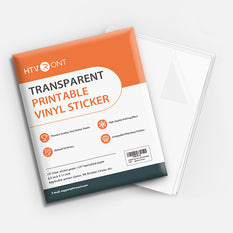
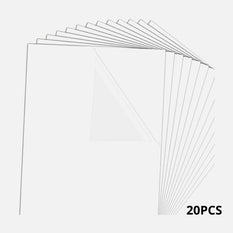
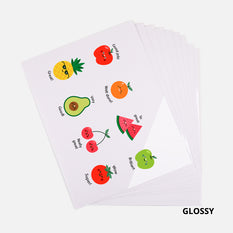
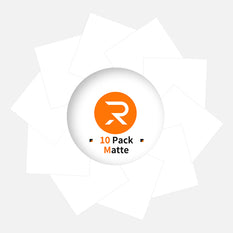
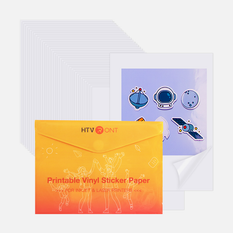
Can I use this printable vinyl with my home printer?
Yes, absolutely! This printable vinyl works with both inkjet and laser printers – no special commercial equipment needed. Simply load the sheet into your printer's paper tray just like regular paper (make sure the printable side faces up, usually indicated on the backing), print your design, and trim it to size.
For best results:
• Inkjet users – select “photo” or “high quality” mode for vibrant colours, and let the print dry for 5–10 minutes before handling to avoid smudging. For extra durability, apply a clear laminate or sealant over the printed area.
• Laser users – use the “heavy paper” or “labels” setting to prevent curling, and allow the sheet to cool flat after printing before cutting.
• Test first – always print a trial run on plain paper to confirm size and alignment before using the vinyl sheet.
This versatile material is perfect for creating custom stickers, labels, decals, and more – whether for personal projects or small-batch handmade products. If you encounter any paper jam issues, try reducing the print quality slightly or using the printer's straight‑through paper path if available. Most home printers handle up to 200 gsm without any trouble.
Happy crafting – we can't wait to see what you create! 🎨
What surfaces can I apply the printed vinyl to?
Yes, you can apply this printable vinyl to a wide range of surfaces! It works best on smooth, non‑porous materials, but with a few tips, you can also use it on some textured or fabric surfaces.
✅ Best surfaces (strongest adhesion):
• Water bottles, travel mugs, and tumblers
• Laptops, phone cases, and tablets
• Glass jars, mirrors, and windows
• Metal surfaces (e.g., car decals, toolboxes)
• Plastic containers and notebooks (with coated covers)
✅ Acceptable surfaces (still works, but press firmly):
• Uncoated paper, cardstock, or cardboard
• Painted wood (smooth finish)
• Canvas or cotton tote bags – however, this vinyl is not heat‑transfer film, so it will not survive machine washing. It's ideal for temporary decorations or light‑use items (e.g., gift tags, event labels).
❌ Surfaces to avoid:
• Rough, porous materials like brick, concrete, or unfinished wood
• Fabrics that will be washed frequently (the adhesive will eventually peel)
• Wet, greasy, or dusty surfaces – always clean and dry first
Pro tips for the best results:
• Clean thoroughly – wipe the surface with rubbing alcohol to remove oils and dust. Let it dry completely.
• Press firmly – use a squeegee or your fingernail to smooth out air bubbles from the centre outward.
• Wait for full bond – for maximum durability, avoid washing or heavy handling for 24 hours after application.
• For curved surfaces – apply heat gently with a hairdryer (low setting) while pressing to help the vinyl conform to the shape.
Whether you're personalising gifts, organising your home, or adding flair to your gear, this vinyl gives you endless creative possibilities – just pick your surface and start sticking! 🎨
Do the printed designs stay on well or fade easily?
Yes, the printed designs stay bright and durable – but how long they last depends on a few key factors. With proper preparation and protection, your custom stickers and decals can remain vibrant for months or even years, even on everyday items.
What affects durability and fading?
• UV exposure – Direct sunlight is the main cause of fading. If your item stays outdoors or near a sunny window, fading will happen faster. Applying a clear UV‑resistant laminate (sold separately) significantly slows this down.
• Ink type – Pigment‑based inks (common in many home printers) are more fade‑resistant than dye‑based inks. If you're using dye ink, we highly recommend sealing your print.
• Surface preparation – A clean, grease‑free surface ensures the adhesive bonds tightly, preventing peeling or scratching that can expose the ink to air and moisture.
• Wear & handling – Frequent rubbing, washing, or harsh chemicals will shorten the life of any printed sticker. For items like water bottles or travel mugs, hand‑washing with mild soap is safer than dishwasher use.
How to make your designs last longer (step by step):
1. Print with the highest quality setting to get dense, saturated colours – this helps resist fading.
2. Let the print dry completely – at least 5–10 minutes for inkjet prints (longer if your room is humid).
3. Apply a clear laminate sheet (sold separately) over the printed vinyl. This adds a protective layer that is waterproof, scratch‑resistant, and UV‑blocking. Follow the laminate’s instructions – usually, you peel, stick, and smooth out bubbles.
4. Trim carefully – leave a small border (about 1–2 mm) around your design so the laminate seals the edges, preventing moisture from seeping in.
5. Apply to a clean, dry surface – wipe with rubbing alcohol and let it evaporate before sticking.
6. Press firmly – use a squeegee or credit card to eliminate air bubbles. For curved surfaces, gentle heat from a hairdryer (low setting) can help the vinyl conform.
Expected lifespan (with laminate protection):
• Indoor use (e.g., laptops, notebooks, indoor décor) – 1–2 years or more with minimal fading.
• Outdoor use (e.g., car decals, outdoor gear) – 6–12 months depending on climate; UV‑laminate extends this.
• Items washed occasionally (hand‑washed) – several months; dishwasher or machine wash is not recommended.
If you notice early fading or peeling:
• Check if you skipped lamination – that’s the most common cause.
• Ensure your printer ink is genuine – third‑party inks may fade faster.
• Clean the surface again – leftover oils can weaken adhesion over time.
For maximum longevity, we always recommend using our compatible laminate sheets and following the full application guide. With that, you can enjoy brilliant, long‑lasting designs that brighten up your daily life! 🌟
Printing and cutting tips for printable vinyl
Getting great results with your inkjet printable vinyl starts with the right printer settings. For inkjet printers, choose "photo" or "high quality" mode to get vivid, saturated colours. Before you hit print, check whether your design needs to be mirrored – this is absolutely essential for printable heat transfer vinyl (also called printable HTV vinyl) because the image must be reversed so it transfers correctly onto fabric. To avoid paper jams, use your printer's straight‑through paper path if it has one, and fan the sheets gently before loading. After printing, let the ink dry for at least 5–10 minutes – patience here prevents smudging. If you're using a cutting machine like Cricut or Silhouette, run a test cut on a scrap piece to dial in the right pressure; a good starting point is between "vinyl" and "heavy cardstock" settings, depending on your blade depth.
How do I choose the right printable vinyl material for my project?
Not every printable vinyl is the same – the right choice depends entirely on your project. If you're working with fabrics, you'll want printable iron on vinyl or printable heat transfer vinyl – these are specially formulated to bond with textiles using heat. Print your design, then use a home iron or a heat press to transfer it onto T‑shirts, tote bags, or aprons. For hard, smooth surfaces like water bottles, laptops, or phone cases, a self‑adhesive inkjet printable vinyl is what you need. Within that category, you can choose glossy (for shiny, eye‑catching finishes) or matte (which is non‑reflective and easy to write on). If you plan to put your design on dark fabrics, look for a printable HTV vinyl that includes a white backing layer – this keeps your colours bright and opaque.
How can I make my printed vinyl designs waterproof and durable?
Most inkjet printable vinyl sheets are water‑resistant, but they aren't fully waterproof – especially if you use standard dye‑based inks. To make your designs truly waterproof, scratch‑proof, and resistant to fading from sunlight, we strongly recommend applying a clear laminate sheet or an acrylic sealant over the printed surface. This step is crucial if you're making items that will be used outdoors, washed frequently, or handled a lot – think water bottles, outdoor gear, or car decals. For printable heat transfer vinyl used on clothing, the heat‑press process itself fuses the ink into the fabric, which gives good wash durability. However, adding an extra heat‑press‑compatible protective film can further extend the life of your prints. A friendly reminder: always hand‑wash items decorated with printed vinyl – dishwashers and harsh detergents will shorten their lifespan significantly.
What's the best way to apply or transfer printable vinyl onto different surfaces?
When you're ready to apply your design, the method depends on the type of vinyl you have. For printable iron on vinyl and printable HTV vinyl, the transfer process is the most critical step. You'll need a heat press or a household iron. If you have a heat press, set it to around 150‑160°C (300‑320°F) and apply firm, even pressure for 15–30 seconds. Using an iron? Set it to the cotton setting (no steam) and press firmly with a thin cotton cloth between the iron and the vinyl – this protects both the vinyl and your iron. Always follow the specific time and temperature recommendations on your vinyl roll. After pressing, peel off the carrier sheet while the vinyl is still warm (hot peel) for most HTV types, but for some, you'll need to wait until it cools (cold peel) – so check the instructions. For self‑adhesive inkjet printable vinyl, it's even simpler: just clean your surface with rubbing alcohol, peel the backing, and stick it on – no heat required!
What should I do if I run into common issues with printable vinyl?
Even with careful preparation, you might hit a few bumps along the way. Here's how to fix the most frequent hiccups:
• Ink smudging or bleeding – This usually means the ink hasn't dried fully. For inkjet printable vinyl, always wait at least 5–10 minutes after printing. If smudging continues, your printer might be laying down too much ink – try reducing the print quality to "normal" or "draft" mode temporarily to see if that helps.
• Vinyl tearing during cutting – The blade might be too deep or the pressure too high. Lower the pressure and run a test cut. For intricate designs, start with a "washi tape" or "sticker paper" preset and adjust from there.
• Bubbles forming under the vinyl – Smooth the vinyl from the centre outward using a squeegee or a credit card. For curved surfaces, apply gentle heat with a hairdryer on a low setting while pressing – this helps the vinyl conform without creasing.
• Design not fully transferring (for printable iron on vinyl) – Increase the pressure or temperature slightly, and make sure your heat source covers the entire design evenly. Also double‑check that you mirrored the design before printing – this is a very common oversight with printable heat transfer vinyl.
• Edges peeling after application – The surface may not have been clean enough. Always wipe with isopropyl alcohol and let it dry completely before applying. For extra security, seal the edges with a clear topcoat or laminate.
With these tips, you'll be ready to create beautiful, long‑lasting projects using any of our printable vinyl products – whether you're making custom apparel with printable HTV vinyl, personalising gifts with inkjet printable vinyl, or crafting unique heat‑transferred items for friends and family. Happy crafting! 🎨
HTVRONT reserves final interpretation rights for this event.


 Cart Unlocks Add-On Deals