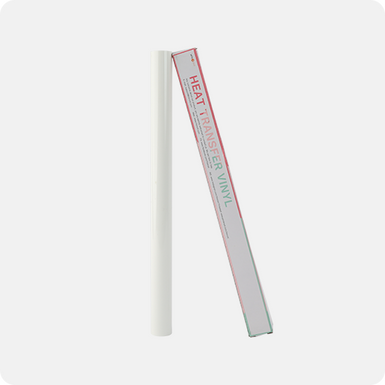
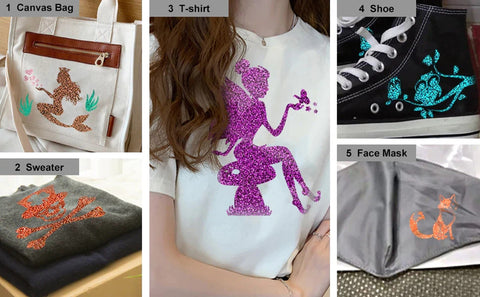
As Heat Transfer Vinyl (HTV) gets increasingly popular in the handicraft industry, various patterns and types of HTV vinyl are engaging in the market at an increasing pace. Among these stylish patterns, Glitter HTV vinyl begins to shine as one of the main casts!
With tons of Glitter HTV brands active on the market, which one should be your best choice and crafting companion? What's the standard of being an excellent HTV Glitter Vinyl? And why would most crafters like to choose HTVRONT as their first and trusted brand?
In this complete guide to Glitter Heat Transfer Vinyl, you will get all the answers to questions you've been curious about for a long time, step-by-step instructions on how to use heat transfer vinyl, and FAQs during the crafting process. The data comes from HTVRONT Lab, demonstrating the most realistic research and development information.
How to Assess Qualified Glitter HTV?
Typically, the appearance is closely associated with the quality if the Glitter HTV Vinyl purchased. The situation of outside glitters is one of the most crucial and direct factors affecting the visual effect and color brilliance of final results.
Some brands may have their glitters distributed unevenly or only very few glitters shining on the surface, it finds out. Selecting these kinds of Vinyl Glitter is not a wise choice since they will definitely ruin the beauty of your designs. Therefore, the outside glitters must cover the vinyl evenly and flatly.
And usually, most of the glitter iron on vinyl on the market wouldn't come with distinct bubbles or creases, but sometimes they may have a few tiny white spots, dirt, pinhole, and sticky residual mixing among the glitters. They may not cause huge damage to your works, but these signs mean that they can be of poor quality for further application and preservation.
Except for these mentioned above, when developing a type of qualified Glitter heat transfer vinyl, people in the R&D department need to exhaust all kinds of possibilities to test diverse materials. These materials for heat transfer vinyl have to go through at least four steps: cutting, weeding, ironing, and machine washing.
To pass the cutting test, the Glitter Vinyl must feature a precise thickness of 0.38mm,±0.03mm, and the iron-on vinyl cannot get cut through for the next weeding process. While weeding, the HTV vinyl should perform butter-like smoothly without tears. And the glitters need to hold up well on the vinyl rather than sticking on the protective film.
When it comes to ironing, qualified Glitter HTV will be heat transferred perfectly on the fabrics or other mediums without easily peeling off, not only the vinyl itself but also the glitters on the surface. And you are able to get to know the quality when there's only a slight odor.
And at last, high-quality glitter iron on vinyl can abide by at least five times of wash cycles while in normal use, and the glitters can stay firm even when there’s an accidental scratch.
Following the brief introduction about the Glitter vinyl, you have the ability to identify the quality of Glitter Vinyl. Let's take some samples from different brands, including HTVRONT, and dive into this topic further.
Comparisons among HTVRONT and Other Brands
As of yet, more than 76 colors of Glitter HTV by HTVRONT have been conducted a test.
Some colors, such as Rainbow White, Light Blue, Purple, Pink, Dark Green, and more, are 0.36-0.41mm thick, performing perfectly during cutting with flat and clear cutting lines. They are easy to weed, and the weeding process is pretty smooth without essential parts getting torn.
While heat pressing these Vinyl Glitter at 150℃ high temperature for 15 seconds, there’s a little odor, but the final results deliver a stable performance on 100% cotton.
And others like Royal Blue, Pink Purple, Red, Viridis, Rose Red, Gold, Laser Silver, and more have basically the same thickness of around 0.36mm. And the cutting and weeding processes are more smooth than the colors above.
When heat transfers these colors of Heat Transfer Glitter Vinyl to fabrics, you can barely sense a smelly odor.
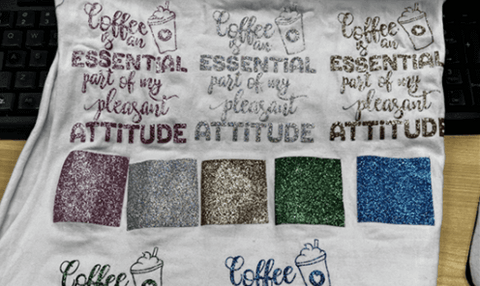
During the machine washing, except Laser Silver will have a few glitters falling off when scratching with a bit of force, others are doing a good job holding up the glitters and designs well.

Now, let’s see how these five brands perform under the same cutting settings.
Cutting Setting: (Data from HTVRONT Lab)
|
Machine |
Cricut Maker R |
|
Pressure |
Default |
|
Blade |
Fine-point Blade |
|
Setting |
Flocked Iron-on |
1. HTVRONT
Color: Silver
Reference Price: $14.99
Thickness: 0.37mm
Odor: (7 points/10) Slight Smells
PET Stickiness: (5 points/5) Strong
Flexibility: (5 points/5) Strong
Cutting Performance: (20 points/20) Flat and clear cutting lines without curling
Weeding Performance: (20 points/20) Smooth weeding without key parts dragging up.
Washing Performance: (19 points/20) There is no glitter falling off and tearing while stretching the final result on the fabric.
2. VANKERTER
Color: Red
Reference Price: $9.99
Thickness: 0.32mm
Odor: (8 points/10) Bare of Smells
PET Stickiness: (2 points/5) Medium
Flexibility: (2 points/5) Weak, making the vinyl easy to break in the weeding process.
Cutting Performance: (12 points/20) Clear cutting lines, but parts of the pattern curls.
Weeding Performance: (5 points/20) Lots of glitters get stuck on the clear film and stick to hands, and some parts don't get cut through.
3. SGHUO
Color: Gold
Reference Price: $13.99
Thickness: 0.32mm
Odor: (8 points/10) Bare of Smells
PET Stickiness: (2 points/5) Medium
Flexibility: (2 points/5) Weak, making the vinyl easy to break in the weeding process.
Cutting Performance: (10 points/20) Coarse cutting lines with parts of the pattern curls.
Weeding Performance: (5 points/20) Lots of glitters get stuck on the clear film and stick to hands, and some parts don't get cut through.
4. TransWonder
Color: Purple
Reference Price: $12.99
Thickness: 0.43mm
Odor: (5 points/10) Strong Smells
PET Stickiness: (3 points/5) Physically sticky but cannot hold up the vinyl.
Flexibility: (2 points/5) Weak, making the vinyl easy to break in the weeding process.
Cutting Performance: (10 points/20) Flat cutting lines, but the PET film cannot fix the vinyl, which cannot get cut through under "Flocked Iron-on" mode.
Weeding Performance: (5 points/20) Most parts don’t get cut through, and the vinyl breaks while weeding.
5. Siser
Color: Blue
Reference Price: $14.99
Thickness: 0.42mm
Odor: (7 points/10) Slight Smells
PET Stickiness: (3 points/5) Physically sticky but cannot hold up the vinyl.
Flexibility: (2 points/5) Weak, making the vinyl easy to break in the weeding process.
Cutting Performance: (10 points/20) The PET film cannot fix the vinyl so that parts of the pattern curl after cutting.
Weeding Performance: (5 points/20) Most parts don’t get cut through, and the vinyl breaks while weeding.
After comparisons, it can be seen that HTVRONT will eventually come out with its premium products only after such complex and sophisticated tests. That’s why you can always choose HTVRONT to have you covered, no matter the colors and patterns.
How to Use Glitter Iron-on Vinyl?
Now, if you have already picked your ideal Glitter Vinyl from the HTVRONT store and still haven't given it a try, then check this!
First, make a great provision for your shiny project in advance:
1. Glitter Heat Transfer Vinyl
2. A Cutting Machine
3. HTVRONT Heat Press machine
4. A Computer
5. Vinyl Weeding Tools
6. A Cutting Mat
7. Teflon Sheet
8. A T-shirt
First, you will learn how to cut Glitter Vinyl. Choose a lovely SVG files for vinyl and put it into an editing software associated with your cutter. Remember to mirror your image before cutting. You don’t want it to turn out to be reversed.
Connect the cutting machine to the computer. Meanwhile, stick your Heat Transfer Glitter Vinyl on the cutting mat in the same place as in the editing program. Feed the cutting mat and vinyl into the machine. Send your cutting code to the machine, and now, the cut begins!
After cutting, use a weeder to get rid of the excess parts. Set your heat press at 310℉ to preheat. At this moment, you can prepare your shirt and designs for heat transfer. Layer t-shirt, vinyl designs, and Teflon sheet on top of another orderly. Then apply the high temperature on these materials for 10-15 seconds. Peel off the protective film after the temperature cooled down. Now, your stunning project is complete! How about feeling free to enjoy it?
If you are a handicraft novice and want to create more fabulous Glitter Vinyl designs, here are proper Glitter HTV heat press settings and cut settings with different cutters and heat presses. Make sure you adopt the proper settings for your designs to avoid further waste.
|
Cutter |
Cricut Maker R |
Explore R Family /Air 2 |
Cameo 4 |
|
Setting |
Flocked / Glitter Iron-on(Pressure: Default,Blade: Fine-Point Blade) |
Iron-on(Pressure: Default,Blade: Fine-Point Blade) |
Heat Transfer, Smooth(Blade:3, Force:8,Speed:5, Passes:2) |
|
Heat Press |
|||
|
Temp |
150℃/302℉ |
||
|
Pressure |
Medium Pressure(3-5KG) |
||
|
Time |
10-15s |
||
|
Note: Different fabrics adopt different parameters. |
|||
Tips about Using HTV Glitter Vinyl
Also, for further better application and preservation, there are some tips for crafters while using Glitter HTV:
1. Ensure to set a proper temperature when heat pressing because excessively high temperatures will destroy materials, and too low temp can't transfer the images successfully.
2. Place a Teflon sheet on the material since PET cannot touch the high-temp surface.
3. Peel off the protective film after the temperature has cooled down.
4. Wash the finished projects until 24 hours after the creative activity.
5. The lifespan of Glitter Iron-on Vinyl is about 1-2 years.
6. The most common medium working with Glitter Vinyl is fabric items, but you can also apply it to other heat-resistant matters like steel, wood, ceramic items, and even several kinds of glass. Make sure your mediums can withstand high temperatures of at least 170℃.
Frequent Asked Questions about Glitter Vinyl
1) Can I not Mirror My Image while Editing Designs?
Typically, it's necessary to mirror the image so that you can get an ideal and perfect design. But for some symmetrical images, it doesn’t matter whether or not you mirror the image since they turn out to be the same.
2) Why Do My Glitter HTV Designs always Fall off?
The reason may be that the temperature, time, or pressure during the ironing process is insufficient, so the vinyl design cannot melt and embed into the fabric thoroughly.
3) How Should I Wash the Crafted T-shirts with a Washing Machine?
After crafting your HTV Glitter Vinyl project, make sure you wash the shirt after 24 hours and turn the inside part out while washing.
4) Why Can't I Weed the Glitter Heat Transfer Vinyl Smoothly?
If your vinyl didn't get cut through, or the flexibility of the vinyl is too weak, your weeding process may be frustrating since there will be lots of stuck or break situations in the middle.
5) What's the Difference between Glitter HTV and Glitter Adhesive Vinyl?
The difference between HTV Glitter Vinyl and Permanent Glitter Vinyl is the techniques they adopt. HTV requires a high temperature to melt the hot glue to achieve heat transfer. And Adhesive Vinyl can directly stick to smooth surfaces based on excellent adhesion, and it doesn't need to mirror before cutting.
6) Why Won't My Cricut Cut Glitter Vinyl?
If your Glitter Vinyl is much thicker or the tenacity is stronger than others, it may be hard to cut through the glitter iron-on vinyl with regular cut settings. You can add the force and cutting times or change the blade into a deep-point one.
7) How to Sublimate on Glitter HTV?
This depends on what kind of vinyl you use. There’s a type of Glitter HTV Vinyl for sublimation, which covers a sublimation coating. Compared to regular HTV, you just need to print your favorite patterns on a sublimation paper first. After your glitter vinyl for sublimation has been transferred to your shirts, cover the vinyl with your sublimation pattern and iron again.
For a detailed tutorial, you can check this Halloween shirts article and take it as a reference.


![[Starter Kit] Auto Heat Press Machine 15" x 15" 110V + Starter Kit Bundle](http://www.htvront.com/cdn/shop/files/20240425-170634_385x.jpg?v=1714036345)
![[Premium Bundle] Auto Heat Press Machine 15" x 15" 110V + 20 rolls HTV Bundle 12“x3ft + Mini 2 Heat Press Machine + Random Sublimation & HTV Bundle ≥ $180](http://www.htvront.com/cdn/shop/files/1UK_4_22c12b1b-12dd-4105-ac25-93e2faae6a8c_385x.jpg?v=1713863580)