


You can achieve flawless results when applying iron-on transfers to dark shirts with dark fabric heat transfer paper. Unlike light-colored fabrics, reverse printing and T-shirt settings aren't needed due to the paper's white background. Pre-test your image on regular paper to ensure visibility and precision. Trim out unwanted white areas before peeling the backing and applying. Here, we will show you the step-by-step process for creating vibrant, blended designs on dark fabric. You will perfect the art of iron transfer paper dark fabric.
Part 1: What is Dark Fabric Transfer Paper
Part 2: How to sublimate the dark t-shirt with Dark Fabric Transfer Paper?
Part 3: Troubleshooting and pro tips
Part 4: Summary and FAQs
Part 1: What is Dark Fabric Transfer Paper
Dark fabric transfer paper is a specialized heat transfer paper that applies images, designs, and graphics onto dark-colored fabrics. Like light-colored transfer paper works for white or light-colored fabrics, dark-fabric heat transfer paper works on darker-colored fabrics. It ensures the design remains vivid and visible against the fabric's background.
Material and Sublimation Compatibility:
Dark fabric transfer paper has a unique composition with a white or light-colored background. This background is crucial because it ensures the printed design stands out when transferred onto dark fabrics. The paper comes coated with a heat-sensitive adhesive that bonds the design to the fabric under heat and pressure.
The primary purpose of dark fabric transfer paper is to sublimate images onto textiles, such as t-shirts, hoodies, and other garments made from darker materials. You can also use it on other fabric-based items like tote bags, hats, and more. This type of transfer paper works well with various fabric compositions, including cotton, polyester, and blends. It allows you to create custom, personalized designs on a wide range of dark-colored fabrics without compromising visibility and vibrancy.
Differences Between Dark and Light Heat Transfer Paper:
- Printing Approach: The most noticeable difference lies in the printing process. Light-colored transfer paper requires you to reverse the image before printing. However, with dark fabric transfer paper, you print the image as you want it to appear on the fabric. This eliminates the need for image reversal.
- Background and Visibility: Dark fabric transfer paperfeatures a white or light-colored background, so the printed image remains distinct from dark fabric. On the other hand, light transfer paper works with light-colored fabrics, allowing the design to stand out without requiring a white background.
- Adhesive Activation: When using an iron transfer paper dark fabric, dark transfer paper requires careful backing peeling before applying heat. This is because the adhesive needs to bond directly with the fabric. In contrast, light transfer paper typically involves peeling off the backing after the transfer is complete.
- Fabric Compatibility:As its name suggests, dark fabric transfer paper is for darker fabrics on materials with deep hues to maintain image visibility. Light transfer paper, on the other hand, is suitable for white or light-colored fabrics.
Dark fabric transfer paper is essential for creating vibrant and eye-catching designs on darker textiles. Its unique composition, printing approach, and adhesive activation process differentiate it from light transfer paper. In short, this transfer paper is an indispensable choice for personalizing dark-colored garments and fabrics.
You May Also Like:
Part 2: How to sublimate the dark t-shirt with Dark Fabric Transfer Paper?
Sublimating a dark t-shirt with dark fabric transfer paper allows you to add personalized designs and graphics to your garments. Follow these steps to achieve professional-quality results:
Materials You'll Need:
- Dark fabric transfer paper
- Inkjet printer
- Iron
- Flat, heat-resistant surface for ironing
- Silicon fixing paper (included with transfer paper or as needed)
- Image design
- Inkscape (or suitable design software)
Stepwise Guide:
Step 1: Resize and Print Your Design
Open your image design in Inkscape or other design software. Resize the image as needed to fit your desired placement on the t-shirt. Print the image using an inkjet printer on the dark fabric heat transfer paper.

Step 2: Allow Ink to Dry
After printing, let the ink dry completely. This prevents ink from smudging or staining the fabric during the transfer process.
An 8-12 hours drying time is advisable to ensure the ink fully sets.
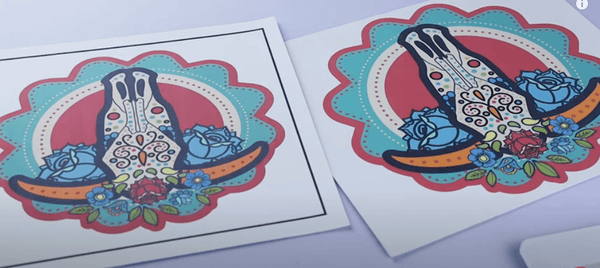
Step 3: Trim the Image
Carefully cut out the desired image from the transfer paper, removing excess paper around the design. So, only the relevant parts of the image get transferred.
![]()
Step 4: Prepare the Fabric
Iron the dark fabric to create a smooth, flat surface for the transfer. Remove any dirt particles that could affect the transfer. Allow the fabric to cool before proceeding.

Step 5: Apply the Transfer
Take off the backing of the transfer paper to expose the adhesive side of the image.
Carefully position the image on the cooled, ironed fabric. Press it down firmly to secure it in place.
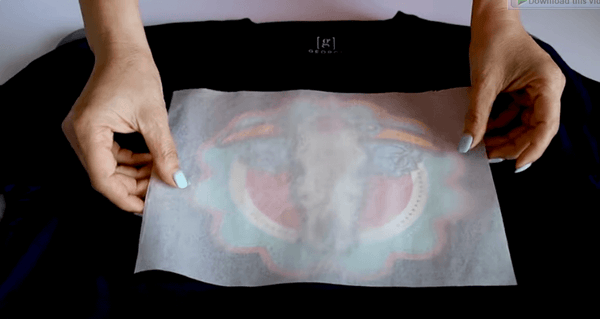
Step 6: Add Heat-Resistant Fabric
Place a heat-resistant fabric, such as silicon fixing paper, over the image to protect the image from direct contact with the iron. Ensure that the heat-resistant fabric covers the entire image.
Step 7: Activate the Adhesive
Heat your iron to the appropriate temperature for the fabric type (check the transfer paper's instructions).
Press the iron firmly over the heat-resistant fabric, moving it up-and-down.
Apply even pressure and heat for 15-30 seconds to activate the adhesive and bond the image to the fabric.
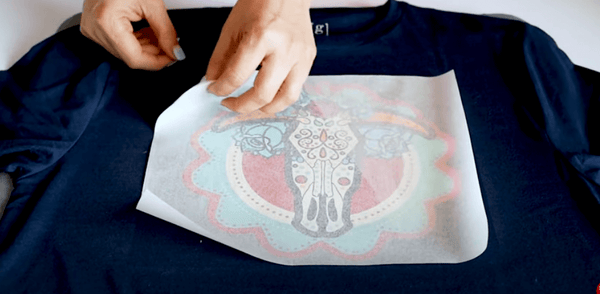
Step 8: Cool and Peel
After ironing, allow the transfer to cool slightly. Gently rub the transfer with a soft cloth to help it cool down further. Once cooled, carefully peel off the transfer sheet, leaving the image adhered to the fabric.
With the steps above and the necessary materials, you can successfully sublimate a dark t-shirt with dark fabric transfer paper. Create custom designs that stand out vibrantly on dark fabrics.
Part 3: Troubleshooting and Pro Tips
For excellent iron transfer paper on dark fabric, you need to pay attention to detail and careful execution. Here are some troubleshooting tips and pro advice so your designs adhere perfectly and remain vibrant:
- Iron-On Transfer Looks Yellow:
Yellowing occurs when the heat is too high. Opt for a temperature of 325°F or the cotton setting to prevent scorching the transfer. Keep in mind that iron heat can vary by brand and model.
- Transfer Not Adhering:
Ensure to remove the transfer paper backing before application. Confirm your iron is at the appropriate temperature (325°F or cotton setting). If the heat is too low, the transfer won't bond. Increase pressure during ironing to allow the transfer to embed into the fabric pattern.
- Transfer Bonds with Iron Bottom:
Always use an ironing sheet between the transfer and the iron to prevent the transfer from sticking to the iron. This protective layer ensures proper bonding while safeguarding the iron's surface.
- Cracking After Washing:
Pre-wash your shirt before applying the transfer to prevent potential shrinkage-related stress on the image. Apply more pressure during transfer to ensure a strong bond. Inadequate pressure can lead to slack, causing cracks after washing.
- Edges Not Adhering:
Pay extra attention to the edges during ironing. Apply the most heat and pressure to these areas to ensure secure adhesion.
- Image Reversed on Shirt:
Double-check your printer settings. Reset the printer to ensure a positive image transfer. Consult your printer's manual or manufacturer for guidance.
Besides, always use dark transfer paper for dark fabrics. Test your image on regular paper to identify potential visibility issues or areas that need trimming before using the transfer paper. Also, due to the white background, working with iron-on transfers on dark fabrics is more complex than on light-colored fabrics.
Add a background color to your design that matches the dark fabric for optimal results, ensuring a cohesive and blended appearance.
Part 4: Summary and FAQs
Thus, this article explored the art of applying iron-on transfers to dark shirts using dark fabric transfer paper. So, master ironing on dark shirts with dark fabric heat transfer paper to create personalized, vibrant designs for that unique touch to your garments. Our steps and pro tips will help you achieve professional-quality results and customized designs that stand out vibrantly on dark fabrics.
FAQs:
Q1: Can I use light-colored transfer paper on dark fabrics?
A: No, light-colored transfer paper is for use on white or light-colored fabrics. Dark fabric transfer paper is specifically for darker fabrics, making your designs visible and vibrant.
Q2: Why is a white background important in dark fabric transfer paper?
A: The white background on dark fabric transfer paper enhances the visibility and vibrancy of your design on dark fabrics. It ensures that your image stands out against the fabric's background.
Q3: Do I need to reverse the image for dark fabric transfer paper?
A: No. Unlike light-colored transfer paper, you don't need to reverse the image when using dark fabric transfer paper. Print the image as you want it to appear on the fabric.
Q4: Why should I pre-test my image on regular paper before using transfer paper?
A: Pre-testing helps you identify any visibility issues or areas that need trimming before using the transfer paper. This step ensures that your final design adheres perfectly and looks as intended on the fabric.


![[Starter Kit] Auto Heat Press Machine 15" x 15" 110V + Starter Kit Bundle](http://www.htvront.com/cdn/shop/files/20240425-170634_385x.jpg?v=1714036345)
![[Premium Bundle] Auto Heat Press Machine 15" x 15" 110V + 20 rolls HTV Bundle 12“x3ft + Mini 2 Heat Press Machine + Random Sublimation & HTV Bundle ≥ $180](http://www.htvront.com/cdn/shop/files/1UK_4_22c12b1b-12dd-4105-ac25-93e2faae6a8c_385x.jpg?v=1713863580)


