


Hello, Cricuters! Get ready to drink from our cup of DIY knowledge in this Cricut tutorial full of helpful tips. In this tutorial, we will help you learn how to print then cut on Cricut and cut around your design using the Print Then Cut feature. We will discuss what this Cricut feature is all about and which machines/devices support it. This guidepost will also hold your hand through the step-by-step process of printing and cutting images on Cricut Design Space. Ready to learn?
Part 1: Learn about the "Print then Cut" function on Cricut
1. What is "Print Then Cut" on Cricut?
Print Then Cut is among my favorite features on Cricut. So, what exactly is it? As the name hints, this feature allows you to print a design using your home printer before cutting around the edges with a Cricut machine. In short, you'll create a layout on Design Space, print it using your inkjet printer, and then use your Cricut Maker or Cricut Explore machine to cut the design precisely.
With that in mind, you'll need the iOS or desktop version of Cricut Design Space to use the Print Then Cut feature. You cannot access this feature on Cricut Design Space for Android. In addition, you can Print Then Cut on most Cricut machines, including Cricut Maker, Cricut Maker 3, Cricut Explore 3, Cricut Explore Air 2, Cricut Explore, Cricut Explore Air, and Cricut Explore One. You cannot use it on Cricut Joy because of the limited workspace.
2. What does "Print Then Cut" do on Cricut?
Knowing what the Print Then Cut function does is essential before learning how to print sublimation images from Cricut Design Space. Actually, this feature can be handy in numerous fun crafting projects. You can use it to make gift cards, stickers, vinyl decals, scrapbooking, banners, bag toppers, and other cool designs. Using it gives you more design flexibility by letting you work with different colors without spending much time layering up. You can print and cut any design that fits on the Design Space canvas.
Part 2: How to Print Then Cut on Cricut?
We understand that mastering the art of printing and cutting using a Cricut machine can be intimidating for a beginner. For this reason, we have prepared a simple step-by-step tutorial on how to print then cut on Cricut without breaking a sweat.
Step 1: Prepare the materials you need.
First, you must source all the materials you need for the project. Start by getting a compatible Cricut smart cutting machine, considering Cricut Joy lacks “Print Then Cut” capabilities. Instead, it supports the Cut and Draw feature, where the device uses a marker or pen to draw on the design to be cut.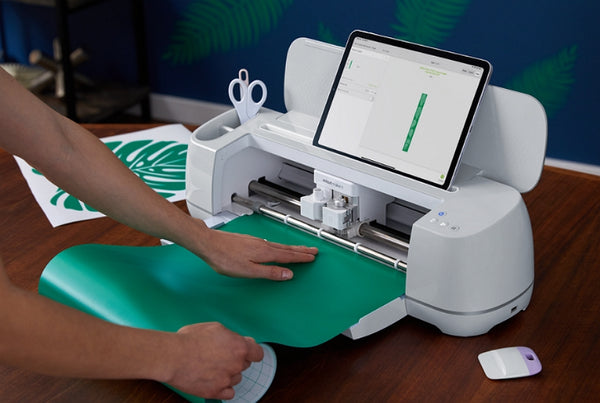
After getting a Cricut machine with the Print Then Cut feature, install Cricut Design Space for MacBook or Windows. You can also find this feature on the iOS version, although the Android app only allows you to design and save projects. It can't print then cut designs.
Next, proceed to choose a home printer that can print in color. Although inkjet printers are the most recommended, you can also use a laser printer for this project. Oh, lest I forget, the printable materials should be non-reflective and have a matte finish.
Step 2: Choose "Print Then Cut" Under Operation.
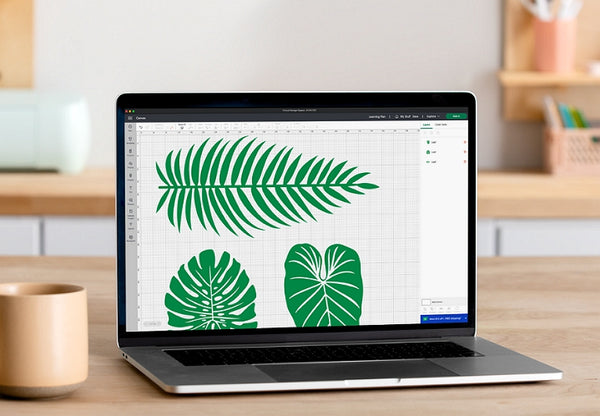
Enough talking already! Let's put your Cricut machine to work. Fire up Cricut Design Space and upload your image file. Click Upload > Upload Image to browse your local storage and select a design. You can print designs in JPG, PNG, or SVG.
After uploading the design, you'll get an option to remove or keep the background. The next step is to decide whether you want to Print Then Cut or cut the image. Of course, we'll select "Print Then Cut" under the "Operation" menu, then tap Upload. Ensure to label your image at this stage.
Step 3: Make the design on Cricut.
Are you happy with your design? Click “Make” to begin the fun part of your project. You'll see a black box around your image, which is the sensor directing your Cricut machine where to cut.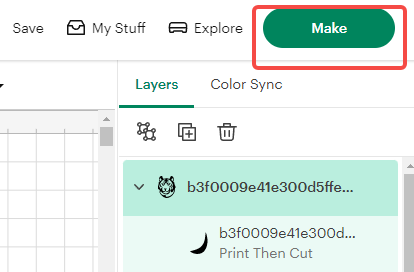
Step 4: Adopt the "Material Load Type" and "Material Size."
Before printing your design, open the "Material Size" to customize it if it's too small to print on an A4 sheet. Also, you can choose a new "Material Load Type" to be On Mat, Without Mat, or On Card Mat.
Step 5: Send the design to your printer.
You're now ready to send your image to the printer. To do that, tap "Send To Printer," then tap "Print" and wait for your design to be printed in seconds.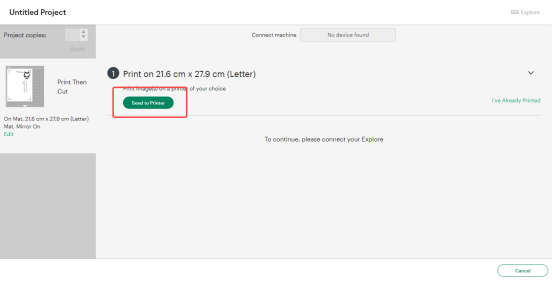
Remember to tap the "Use System Dialog" toggle to allow you to change your printer settings. You can choose a printer, number of pages, color, media type, and more customization settings on the Printer dialogue. Congratulations, you have done it!
Part 3: Troubleshooting Print Then Cut Problems
1. Can I use any printer to "print and cut" on Cricut?
Technically, Cricut works with any inkjet printer. However, it's essential to consider the type of printer to use based on the paper type of thickness used on your Cricut machine. Laser printers can also print and cut Cricut designs. But note that these printers apply toners with heat, meaning they are incompatible with materials such as waterslide and printable vinyl.
2. How do I connect Cricut Design Space to my printer?
Connecting Cricut Design Space to your home printer is relatively easy if you're using a non-USB printer. To do that, open the Printers window and tap the Add a Printer button. Once the Add Printer Wizard launches, follow the setup instructions to find and connect your printer. You may also want to calibrate the machine by clicking Menu > Calibration > Print Then Cut.
3. Why is Cricut Design Space warning me that my image is too large?
If you get the "Image Too Large" notification for the printable design set for Print Then Cut, you must resize the layout or select a larger page size. To rectify the situation, tap to open the warning message, then choose the "Auto-Resize Image" or "Change Page Size" option. Alternatively, click Menu > Settings > Print Then Cut Settings, and choose a default page size.
Summary
Do you still have any questions or doubts about how to print sublimation from Cricut Design Space? We hope that this tutorial has been helpful. This feature will help you make cards and stickers or even print on printable heat transfer vinyl to make unique t-shirts and other fabric designs. You can achieve many fun projects with this Cricut Design Space feature. Try it yourself!


![[Starter Kit] Auto Heat Press Machine 15" x 15" 110V + Starter Kit Bundle](http://www.htvront.com/cdn/shop/files/20240425-170634_385x.jpg?v=1714036345)
![[Premium Bundle] Auto Heat Press Machine 15" x 15" 110V + 20 rolls HTV Bundle 12“x3ft + Mini 2 Heat Press Machine + Random Sublimation & HTV Bundle ≥ $180](http://www.htvront.com/cdn/shop/files/1UK_4_22c12b1b-12dd-4105-ac25-93e2faae6a8c_385x.jpg?v=1713863580)


