


The festive season is knocking, meaning it's time to dust off your Cricut machine once again and get to work. With this machine, you can create unique homemade crafts, such as personalized Cricut Christmas ornaments and surprise your friends and family. So, if you're looking for DIY Cricut Christmas ornaments ideas, you've just landed on the right page. We will arm you with a comprehensive list of the cutest homemade gifts and Christmas crafts this holiday season. Keep scrolling to learn!
Part 1: Overview of Various Cricut Christmas Ornaments
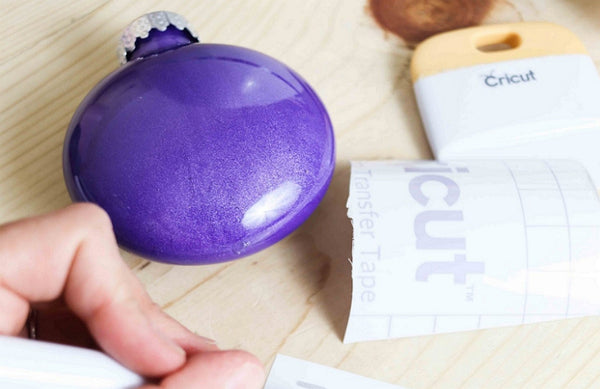
1. Glitter Christmas Lights
Needed supplies:
- Polycrylic Clear Gloss
- Glitter
- Clear Christmas Light
- Funnel
- HTV Vinyl
- Cricut Maker
Glittering lights have always been part of the Christmas tradition. Below is how to go about this project:
Step 1. Start by pouring the clear Polycrylic finish gloss into the ornaments (these can be small clear bottles) using a funnel. The good thing is that an 8fl oz can handle 50 to 80 ornaments, which is a lot.
Step 2. Make sure you swirl/shake the ornament until the whole inside is coated, then pour the excess liquid back into the container.
Step 3. Let the ornaments rest for a few minutes, then use a funnel to pour in your glitter. Again, swirl the ornament to ensure every inside part is covered with glitter.
Step 4. Now, leave the glitter to dry out, preferably overnight. Remember, you can further decorate the ornaments with HTV Vinyl, transfer tape, and a Cricut machine.
2. DIY Acrylic Christmas Ornaments

Needed supplies:
- Clear Acrylic Blank
- Adhesive Vinyl
- Cricut Maker
- Ribbon
- Transfer Tape
Another way to decorate your Christmas tree is by using acrylic ornaments. These ornaments are minimalistic and classy, as you'll see in the steps below:
Step 1. Purchase clear, blank acrylic ornaments you want to customize with letters and glitter. Ensure the back and front of the acrylic ornament is clean and dry.
Step 2. Next, use your Cricut machine to cut the adhesive vinyl. You can choose any Christmas-related word, including Merry, Happy, or Joy, and use weeding tools to remove the excess vinyl.
Step 3. Use a transfer tape to transfer the vinyl to the acrylic blank. Now tie the ornament to your Cricut Christmas Ornaments to a tree using a ribbon and enjoy.
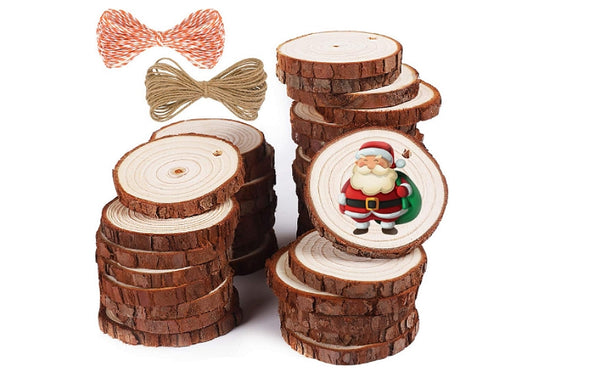
3. Wood Slice Ornaments
Needed Supplies:
- Wood Slice
- Weeding tool and scraper
- Paint and brushes
- Cricut Maker
- Adhesive Vinyl
- Transfer tape
- Ribbon
- Twine
Wood slices preset fantastic Cricut Christmas Ornament Ideas for this festive season. Let's quickly go through the steps:
Step 1. Cut some wood slices, preferably 2.5 inches wide.
Step 2. Use a sponge brush to paint a circle on one side of the wood slice and let it dry for at least 24 hours. This can be optional, depending on the transfer design.
Step 3. Choose your preferred Christmas word on Cricut while considering the size of the image and the wood slice. This should allow the word to fit nicely in the wood slice.
Step 4. Next, cut the design on a vinyl material, then cut the design. Remember to use your weeding tool to remove excess vinyl.
Step 5. Cut a transfer tape, place it on the weeded vinyl, and then transfer the design to the painted wooden slice.
Step 6. Drill a hole into the wooden slice, then attach a twine to hang the ornament. You can cut a ribbon and create a bow to make this homemade Cricut Christmase ornaments look even better.
4. Family Christmas Tree Ornament
Needed supplies:
- Cricut Maker
- Cardstock
- Double Sided Adhesive Foam Strips and Tabs
- Paper Crafting Glue
- Hot Glue Gun
- Twine
If you like making 3D crafts using paper, this Cricut Christmas gift idea should appeal to you. You only need your Cricut Maker machine and some cardstock to get started.
Step 1. Add a cut file on Cricut Design Space, and resize the design to whatever dimensions you prefer.
Step 2. Send the cut file design to the mat and duplicate it several times, depending on the number of designs you want to create.
Step 3. Cut the designs by following the on-screen instructions, then carefully fold the pieces along the score lines.
Step 4. Now, match the pieces and glue them together to create a 3D ornament. After assembling the piece, tie the ornament using twine and finish with a ribbon bow at the top. Remember to decorate the ornament with beads and glitter to make it attractive.
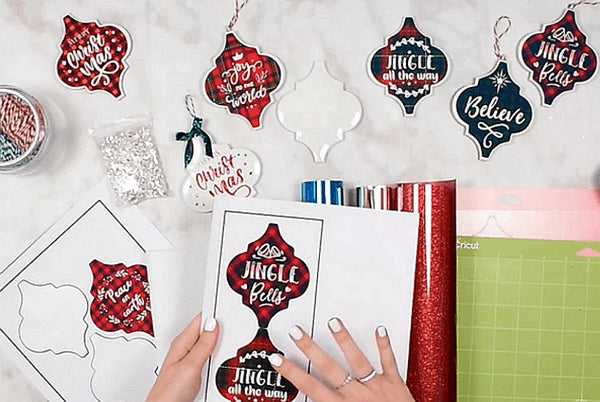
5. DIY Arabesque Tie Ornament
Needed supplies:
- Adhesive Vinyl
- Cricut Maker
- Glue
- Hot Glue Gun
- Ribbon
Creating Cricut Christmas ornaments using arabesque is a trendy craft idea to try out this holiday season.
Step 1. Get high-quality Arabesque titles from Lowe, Floor and Décor, Home Depot, etc. Proceed to pluck two tiles from the set.
Step 2. Next, measure your tile's size and adjust the design's measurement on Cricut Design Space.
Step 3. Place your adhesive vinyl on the Cricut mat, then load the mat and begin the cut when the machine prompts you.
Step 4. Use your weeding tool to peel off the extra vinyl and place a piece of transfer tape on the design.
Step 5. Peel off the transfer tape and carefully place it on the arabesque tile to apply the design.
Step 6. Flip over the mask and apply glue to the point where you'll attach a hanging hook, such as a ring or earring.
Step 7. When completely dry, tie a ribbon and hang your tiles on a Christmas tree. That's it!
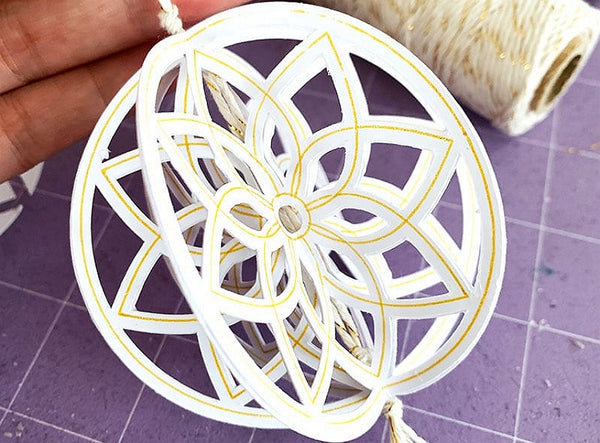
6. DIY Honeycomb Paper Christmas Ornaments

Needed supplies:
- Colored Cardstock
- Cricut Cutting Machine
- Paper Glue with a fine tip
- Flat Brush
Lastly, we want to learn how to make a custom honeycomb Cricut Christmas ornaments. It's a simple project, as you'll know in the step-by-step instructions below:
Step 1. Load the ornament shape designs on your Cricut machine to create and cut at least 60 pieces. This should use no more than three sheets of colored cardstock.
Step 2. Use glue with a pointed-tip bottle to stick the ornaments together. Using a bottle with a fine tip will help you avoid applying excess glue where you don't want to.
Step 3. After creating a thick honeycomb, it's time to add magnets to keep open and round. Ensure you position the magnet where it attracts the magnet on the other side of the ornament.
Step 4. Squeeze the flat edges of the paper, then use your flat brush to apply glue and place the twine over the edge with a glue layer. Add a bit of glitter to your ornament before hanging it.
Part 2. Q&A
1. What kind of vinyl is best for glass ornaments?
Both adhesive and iron-on vinyl are suitable for creating glass ornaments. However, both have their pros and cons. For example, a weak adhesive vinyl can stick to the glass for a while and eventually peel off. Conversely, you must be cautious when applying heat transfer vinyl on glass ornaments. So, learn how these two work before choosing.
2. Why is my Cricut vinyl not sticking to glass?
Oil, dust, or dirt on the glass surface can prevent the Cricut vinyl design from sticking. So, ensure the glass is clean and dry before applying the vinyl.
3. How do you get vinyl to lay flat on ornaments?
It's usually best practice to start by applying pressure on the center of the design, then continue outwards while smoothly and gently pressing the vinyl as you go. Also, ensure you place the design in the center of the ornament, especially when using curved shapes like bottles.
4. Where can I get Christmas ornaments SVG free?
If you have some graphic design knowledge, use a program like Photoshop to create and export custom SVG designs for your Cricut Christmas ornament. Alternatively, you can get free Christmas ornaments SVG files for Cricut on Loklikworkshop.com. You'll get thousands of designs from the website's exclusive designers here.


![[Starter Kit] Auto Heat Press Machine 15" x 15" 110V + Starter Kit Bundle](http://www.htvront.com/cdn/shop/files/20240425-170634_385x.jpg?v=1714036345)
![[Premium Bundle] Auto Heat Press Machine 15" x 15" 110V + 20 rolls HTV Bundle 12“x3ft + Mini 2 Heat Press Machine + Random Sublimation & HTV Bundle ≥ $180](http://www.htvront.com/cdn/shop/files/1UK_4_22c12b1b-12dd-4105-ac25-93e2faae6a8c_385x.jpg?v=1713863580)


